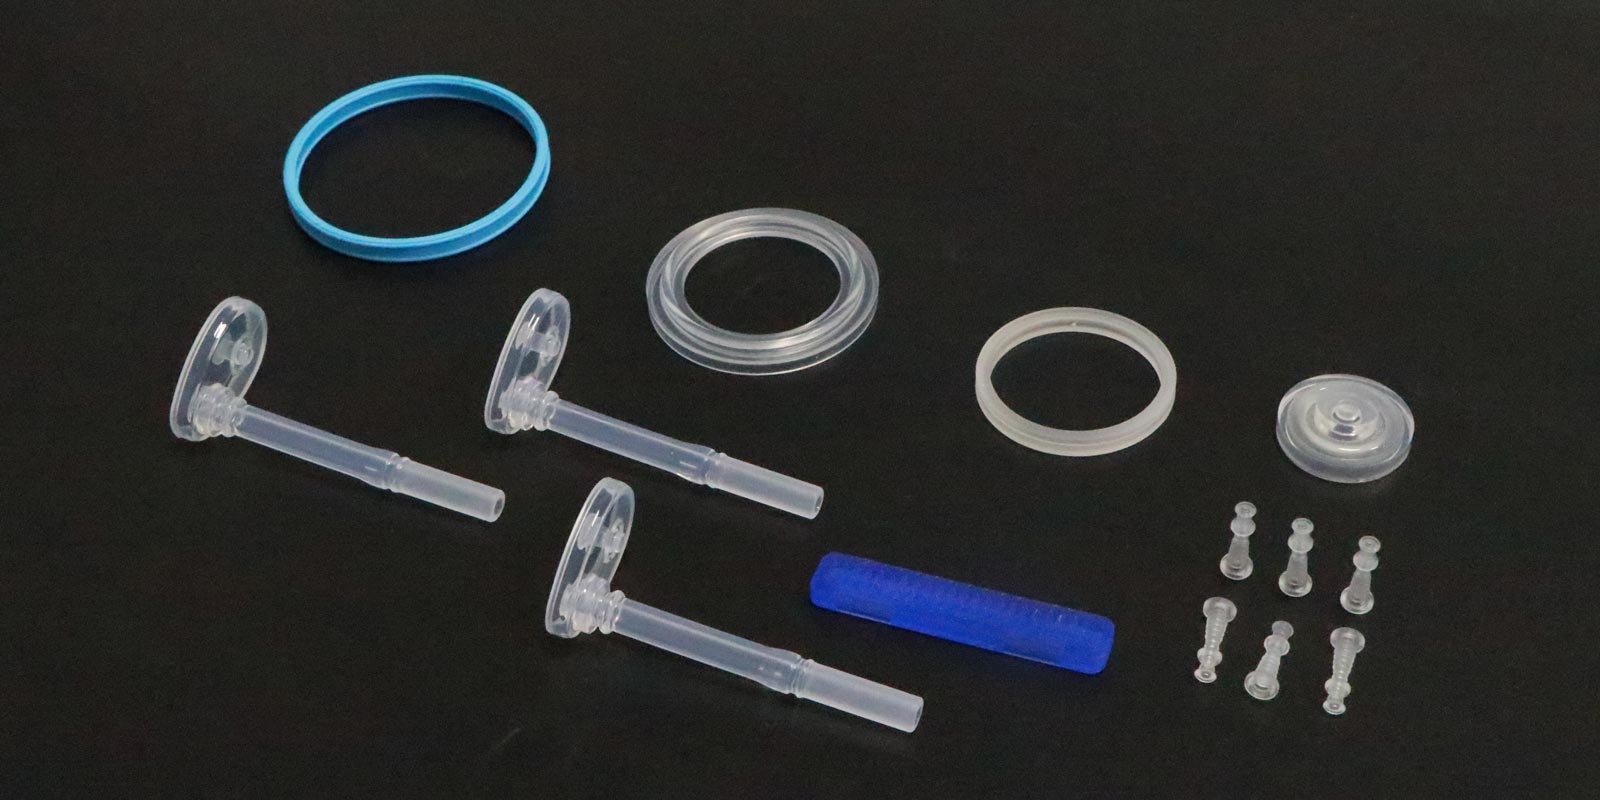
Luer connectors, widely used in the medical field as standardized connection components, have their mold precision and reliability directly related to the quality and safety of the final products. Given that Luer connector molds need to meet special requirements such as high precision, corrosion resistance, and biocompatibility, their maintenance and care must adhere to more stringent technical specifications. The following elaborates on the maintenance and care tips for Luer connector molds from three dimensions: daily maintenance, regular maintenance, and troubleshooting, combined with industry practical experience.
I. Daily Maintenance: The Core of Preventive Care
1. Pre-production Inspection and Cleaning
-
Mold Surface Cleaning: Use a lint-free cloth dampened with isopropyl alcohol or a specialized cleaning agent to thoroughly remove oil stains, rubber filaments, and residues from the mold cavity, parting surface, and vent slots. For precision thread areas, use a soft-bristled brush along with compressed air to blow and clean, avoiding surface scratches.
-
Cooling System Inspection: Clean the cooling water channels with compressed air to ensure there are no blockages or rust. If scale deposits are found, use a specialized descaling agent for circulating cleaning and replace the filter screen.
-
Guiding Mechanism Lubrication: Apply high-temperature-resistant grease (such as molybdenum disulfide-based grease) to moving parts such as guide posts, guide sleeves, and sliders to ensure smooth movement without jamming.
2. In-production Monitoring
-
Temperature Control: Use an infrared thermometer to continuously monitor the surface temperature of the mold cavity to prevent local overheating, which could lead to material degradation or mold deformation. For hot runner molds, monitor the temperature of the heating coils separately, keeping the fluctuation range within ±2°C.
-
Pressure Monitoring: Regularly check the matching between the clamping force of the injection molding machine and the mold locking force to prevent flash due to insufficient pressure or mold cracking due to excessive pressure.
-
Waste Removal: Clean the waste channels of the trimming molds every 2 hours to prevent waste accumulation from affecting the sharpness of the cutting edges.
3. Post-shutdown Handling
-
Rust Prevention: For short-term shutdowns (≤24 hours), spray a thin layer of anti-rust oil on the cavity surface. For long-term shutdowns, disassemble the mold, apply butter or specialized anti-rust grease to all metal parts, and wrap them in moisture-proof paper for storage.
-
Residual Material Removal: If there are residual sprues at the injection port, first soften them with a heating rod and then gently tap them out with a copper rod. Do not use hard tools such as screwdrivers to avoid damaging the sprue bush.

II. Regular Maintenance: The Key to Prolonging Mold Life
1. Graded Maintenance System
-
Level A Maintenance (Daily): Clean the mold surface, check the lubrication of the guiding mechanism, and record the number of production parts and any abnormalities.
-
Level B Maintenance (Weekly): Disassemble the mold, clean the cooling water channels, check the wear of easily damaged parts such as ejector pins and springs, and replace damaged parts.
-
Level C Maintenance (Monthly): Conduct a comprehensive inspection of the mold, including the dimensional accuracy of the cavity, the clearance of thread fits, and the fit of the parting surface. If necessary, perform polishing or welding repair.
2. Maintenance of Key Components
-
Thread Area Maintenance: Polish the thread cores every 5,000 mold cycles to eliminate scratches. When polishing, use a specialized fixture to fix the threads to avoid deformation.
-
Spring Replacement: Replace springs that are broken or have a deformation exceeding 5% of their original length with parts of the same specifications (identified by color, outer diameter, and length).
-
Hot Runner System Maintenance: Check the resistance values of thermocouples and heating coils every 3 months, clean carbon deposits from the nozzles, and replace aging sealing rings.
3. Storage Environment Management
-
Temperature and Humidity Control: Maintain the mold warehouse temperature at 20-25°C and relative humidity ≤60% to prevent metal parts from rusting and plastic parts from aging.
-
Dust Prevention Measures: Cover the molds with dust covers when storing them and regularly clean the dust in the warehouse with a vacuum cleaner.
III. Troubleshooting: Points for Quick Production Recovery
1. Common Faults and Solutions
-
Cutting Edge Chipping: Repair the worn areas by argon arc welding, then re-machine them to the design dimensions using a CNC milling machine, and finally polish them to Ra ≤ 0.4μm.
-
Excessively Tight Thread Fit: Use a thread gauge to check the fit clearance. If the deviation exceeds 0.02mm, re-machine the thread cores or cavities.
-
Leakage at the Parting Surface: Check for dents or burrs on the parting surface, smooth them with an oilstone, and repair the flatness by electrical discharge machining if necessary.
2. Professional Repair Process
-
Fault Diagnosis: Use a coordinate measuring machine to detect mold dimensions and analyze the root cause of the problem in combination with trial-molded samples.
-
Repair Plan Formulation: Choose between local repair and overall replacement based on the fault type, and prefer advanced processes such as laser cladding to extend mold life.
-
Post-repair Verification: After re-trial molding, ensure no abnormalities occur during 100 consecutive mold cycles before putting the mold back into formal production.
IV. FAQ: Common Questions and Answers on Luer Connector Mold Maintenance
Q1: What is the rust prevention cycle for Luer connector molds?
A: For short-term shutdowns (≤24 hours), anti-rust oil should be sprayed daily. For long-term shutdowns (>24 hours), anti-rust grease should be reapplied every 7 days, and the rust prevention effect should be regularly checked.
Q2: How can I tell if a mold spring needs to be replaced?
A: Replace the spring immediately if it is broken, has a permanent deformation exceeding 5% of its original length, or has a spring force attenuation exceeding 20%.
Q3: Why does sticking occur in the mold cavity even after polishing?
A: Possible reasons include insufficient polishing (Ra > 0.4μm), improper selection of mold release agents, or excessively high injection temperatures. Adjust the process parameters and re-polish accordingly.
Q4: What should I do if the heating coils of a hot runner mold frequently fail?
A: Check for loose connections of the heating coils, ensure the temperature controller parameters are set correctly, and regularly clean carbon deposits from the nozzles to prevent local overheating.
Q5: What information should be included in the maintenance records of Luer connector molds?
A: Record the maintenance date, fault phenomena, handling measures, specifications of replaced parts, and trial molding results to provide data support for subsequent maintenance.
By implementing systematic maintenance and care, the service life of Luer connector molds can be extended by more than 30%, while significantly reducing the defect rate. Enterprises should establish comprehensive mold management files and combine preventive maintenance with predictive maintenance technologies to achieve lean mold management throughout their lifecycle.


 Home
Home